Pierogi are a beloved staple of Polish and Ukrainian cuisine, and it’s easy to see why—they’re comforting, delicious, and incredibly versatile. These half-moon-shaped dumplings are made from a simple dough and stuffed with savory or sweet fillings, then boiled and often pan-fried to perfection. Pierogi are so cherished that there are entire festivals dedicated to them, not just in Eastern Europe, but anywhere there’s a strong Eastern European community. You can find them filled with everything from potatoes, mushrooms, and cheese to meat or sauerkraut, but my favorite is the classic cottage cheese and mashed potato filling, topped with caramelized onions.
Making pierogi is simpler than it seems: brown the onions, make the dough, mix up the filling, and stuff and fold the dough into perfect little dumplings. After a quick boil and pan-fry, they’re golden and irresistible. Serve with fresh herbs and a dollop of sour cream, and watch them disappear!
Table of Contents
What You’ll Need To Make Pierogi

- All-Purpose Flour: Provides the structure for the dough. Measure by spooning it into the measuring cup and leveling it off to ensure accuracy.
- Water: Binds the ingredients together to form a pliable dough.
- Eggs: Adds richness and helps bind the dough.
- Butter: Used for sautéing the onions and frying the pierogi to prevent sticking and add a rich flavor.
- Onions: Add sweetness and depth to the filling and are scattered over the cooked pierogi adding a flavorful garnish.
- Mashed Potatoes: The creamy base of the filling; yellow potatoes are the best option but any kind will work. You’ll need 1 pound of potatoes, peeled and cut into ½-inch cubes. Boil the potatoes until tender, 10 to 12 minutes, then drain. Transfer back to the pot and heat over medium-low heat, mashing with a potato masher, until any moisture has evaporated, and the potatoes are mashed.
- Cottage Cheese: Adds creaminess and slight tang to the filling.
- Vegetable Oil: Prevents the cooked pierogi from sticking together.
- Fresh Parsley or Dill: Adds a fresh, herby finish when serving (optional).
- Sour Cream: Traditional accompaniment, adding a creamy, tangy flavor.
- Jump to the printable recipe for precise measurements
Step-By-Step Instructions
Step 1: Prepare the Dough
In a large bowl, mix the flour and salt.

Add the water into a liquid measuring cup that holds at least 2 cups of liquid. Add the eggs to the water and whisk with a fork until evenly combined.

Add the water/egg mixture to the dry ingredients.

Stir with a fork to evenly moisten until the ingredients.

Continue stirring until the ingredients come together into a loose, shaggy mass.

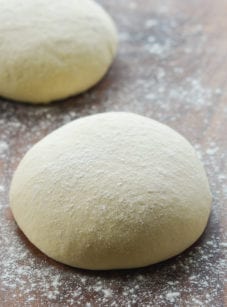
Using your hands, knead the dough in the bowl until it comes together into a ball. Lightly dust a clean work surface with flour. Invert the dough onto the surface and knead for 1 to 2 minutes, dusting with more flour as necessary, until smooth and elastic. Wrap the dough in plastic wrap and let rest at room temperature for 30 minutes.

Step 2: Make the Filling
Melt the butter in a medium skillet over medium heat. Add the onions to the melted butter and season with ⅛ teaspoon salt and a few grinds of black pepper. Cook, stirring frequently, until golden brown and softened, 8 to 10 minutes. Remove from the heat. Set aside about 1 cup of onions for the garnish.

In a medium bowl, combine the onions from the skillet with the mashed potatoes, cottage cheese, 1 teaspoon salt, and ¼ teaspoon black pepper. Mix well.

Step 3: Roll and cut the dough
Divide the dough into two even pieces. (Wrap one piece back in plastic wrap while you work with the other piece.) Dust some flour onto a clean work surface and onto a baking sheet (that will hold the pierogi), then roll out one portion of dough as thinly as possible, about 1/16 inch.

Using a 3-inch cookie cutter or inverted glass, cut out as many disks of dough as you can. Remove the scraps and wrap them in plastic wrap (you’ll re-roll them later).

Step 4: Assemble the Pierogi
Have a small bowl of water nearby to help moisten the dough edges if necessary. Working with one dough disk at a time, spoon a scant tablespoon of filling onto the center of the disk.

Fold the dough in half over the filling, creating a crescent shape.

To seal, pinch the top edges together firmly. Then continue sealing down both sides using a pinch-and-twist method: with your thumb and forefinger, pinch a small section of dough near the top, twist it slightly upward, and press it into the next section of dough. Repeat this pinch-and-twist motion all the way down both sides to create a secure, sealed, and very thin edge.

Once sealed, place the pierogi on the prepared baking sheet. Repeat this process for the remaining dough disks and filling. Work fairly quickly, as the pierogi can be harder to seal if they begin to dry out. Moisten the inside of half the disk only if necessary to help the dough adhere.
Unwrap the remaining dough and repeat the process. You can re-roll the scraps one time by forming them into a ball and rolling them out again, but avoid rolling them out more than once, as this can make the dough tough.

Step 5: Cook the Pierogi
Bring 3 quarts of salted water to a boil in a large pot over high heat. Add a single layer of pierogi to the boiling water, stirring gently to ensure they don’t stick together. Let them cook for 4 to 5 minutes. Use a slotted spoon or spider strainer to remove the pierogi from the pot.

Transfer the cooked dumplings to a tray or baking sheet and toss with a light coating of oil to prevent sticking. Repeat with the remaining pierogi.

To pan-fry the pierogi, work in batches. Melt 1 to 2 tablespoons of butter in a large skillet over medium-high heat until it begins to crackle. Add the boiled pierogi in a single layer, ensuring they don’t overlap, and cook until crisp and golden, 1 to 2 minutes per side. Repeat with the remaining pierogi, adding more butter as needed.

Serve hot, topped with reserved onions and parsley or dill (if using), and with sour cream on the side.

Frequently Asked Questions
Sure! Uncooked assembled pierogi can also be made ahead and kept in the refrigerator for up to two days. Place them in a single layer between sheets of parchment or wax paper in an airtight container, or on a baking sheet covered tightly with plastic wrap. To prevent sticking, be sure they don’t touch. The uncooked pierogi can also be frozen for up to 3 months. After sealing the pierogi, freeze them on the baking sheet until solid, a few hours. Transfer the frozen pierogi to an airtight container. When ready to cook, extend the boiling time to 7 to 8 minutes.
Yes, pierogi dough can be made up to 2 days ahead of time and stored in the refrigerator. Just make sure to wrap it tightly in plastic wrap or store it in an airtight container to prevent it from drying out. When you’re ready to use it, let the dough come to room temperature before rolling it out. You can also freeze the dough for longer storage—just thaw it in the fridge overnight before using.
Definitely! The options for pierogi fillings are virtually endless! While potato and cheese is a classic favorite, sauerkraut and mushrooms are also popular choices. Keep in mind that if you plan to use any veggies, they should first be finely chopped, seasoned, and sautéed. You can also get creative with the cheese and swap out cottage cheese for cheddar or ricotta. If you’re comfortable improvising, go for it, but if you feel more confident following a recipe, just do a quick search online for pierogi fillings.

You May Also Like


The post Pierogi appeared first on Once Upon a Chef.